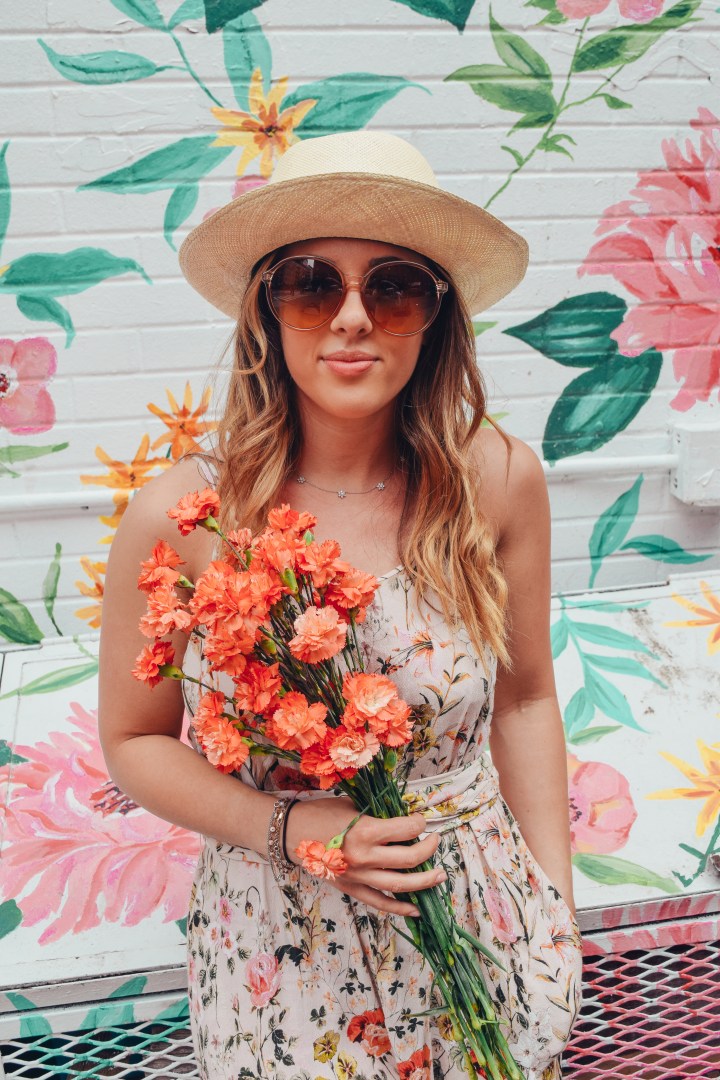
I Miss You, Cabo.
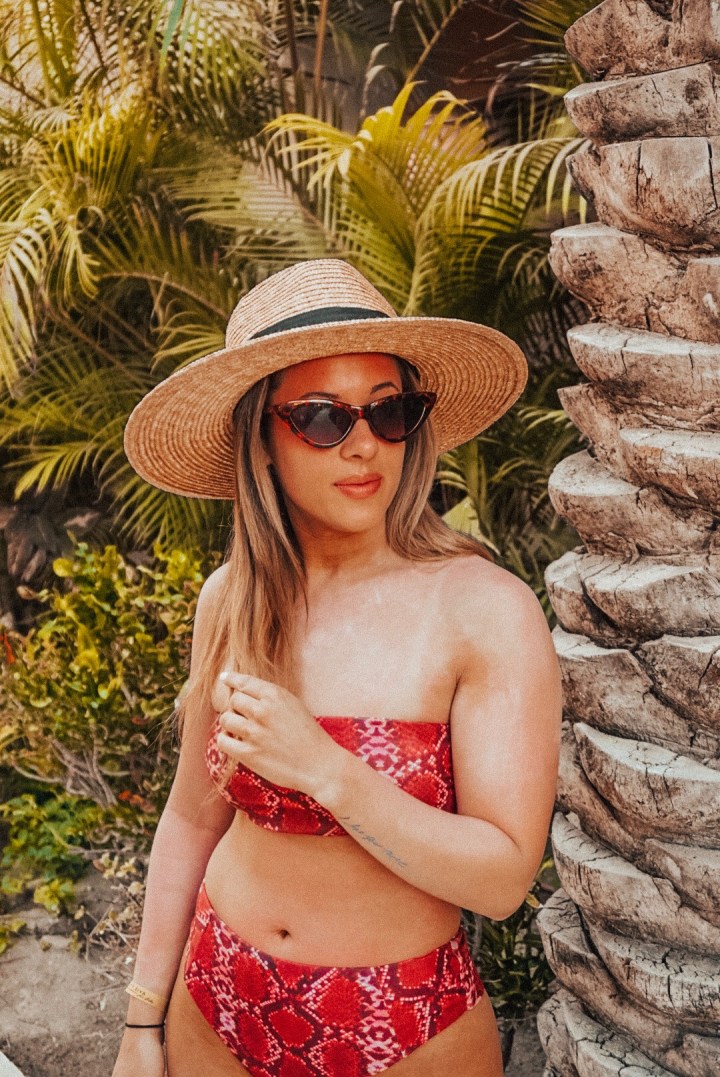
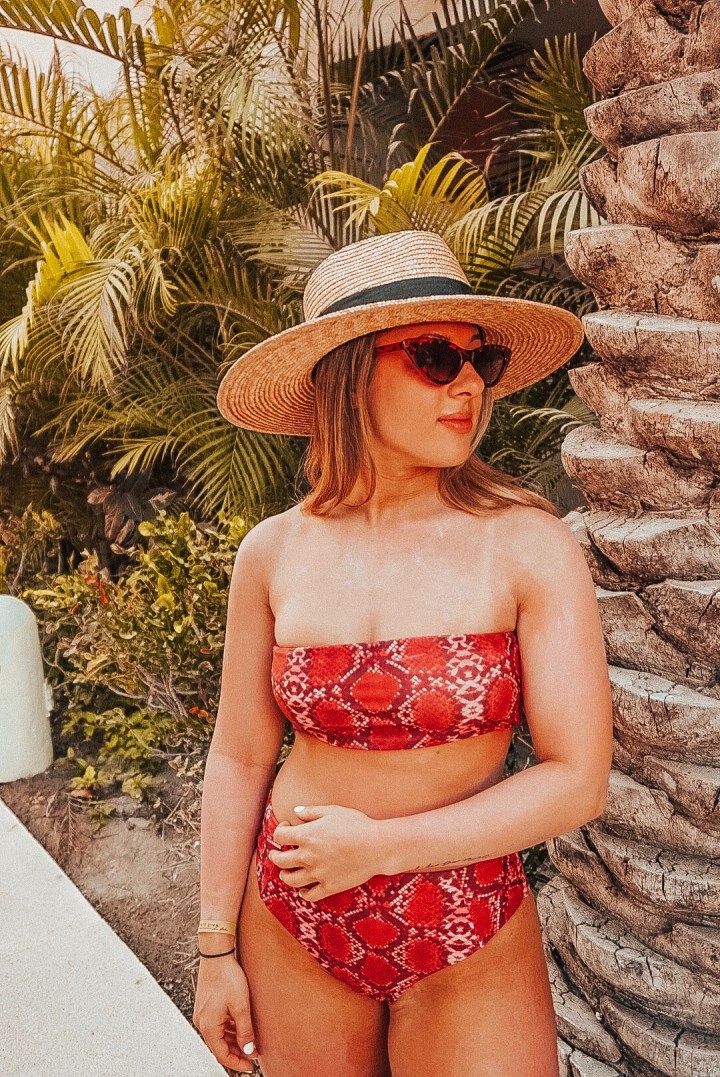
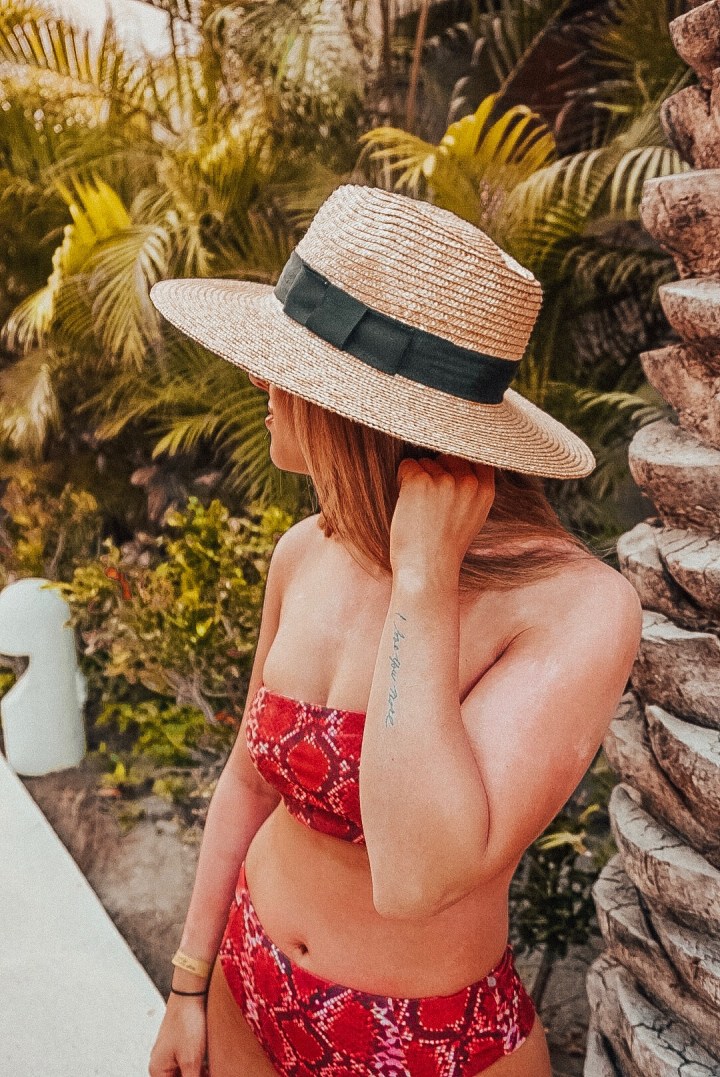
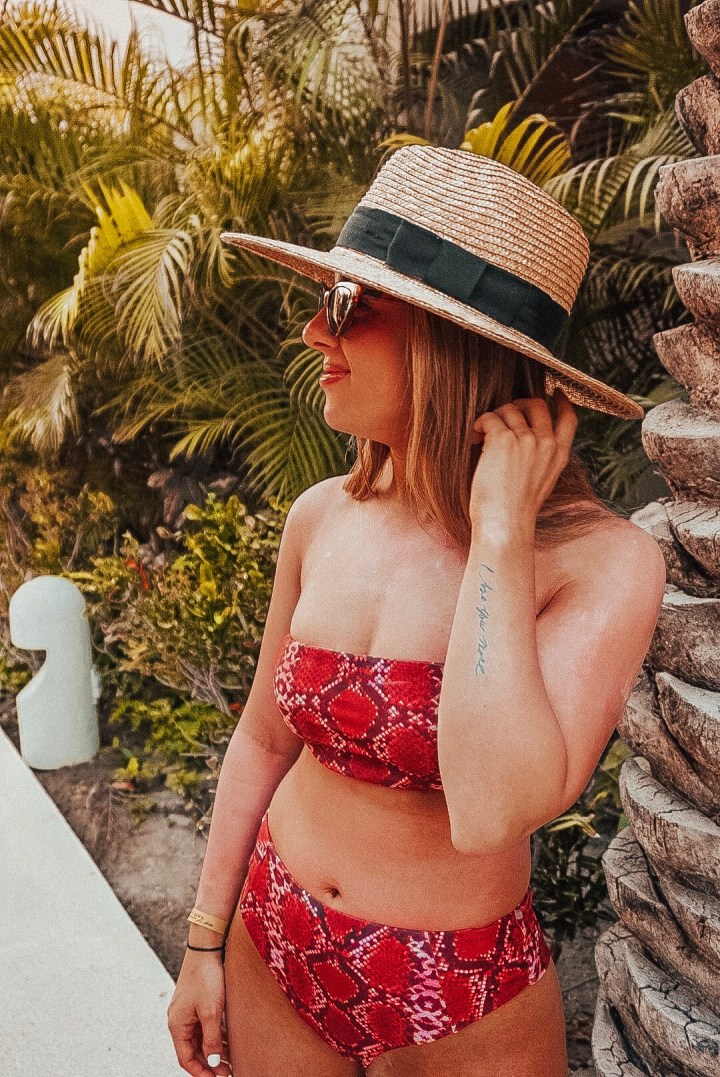


once you become fearless, life becomes limitless


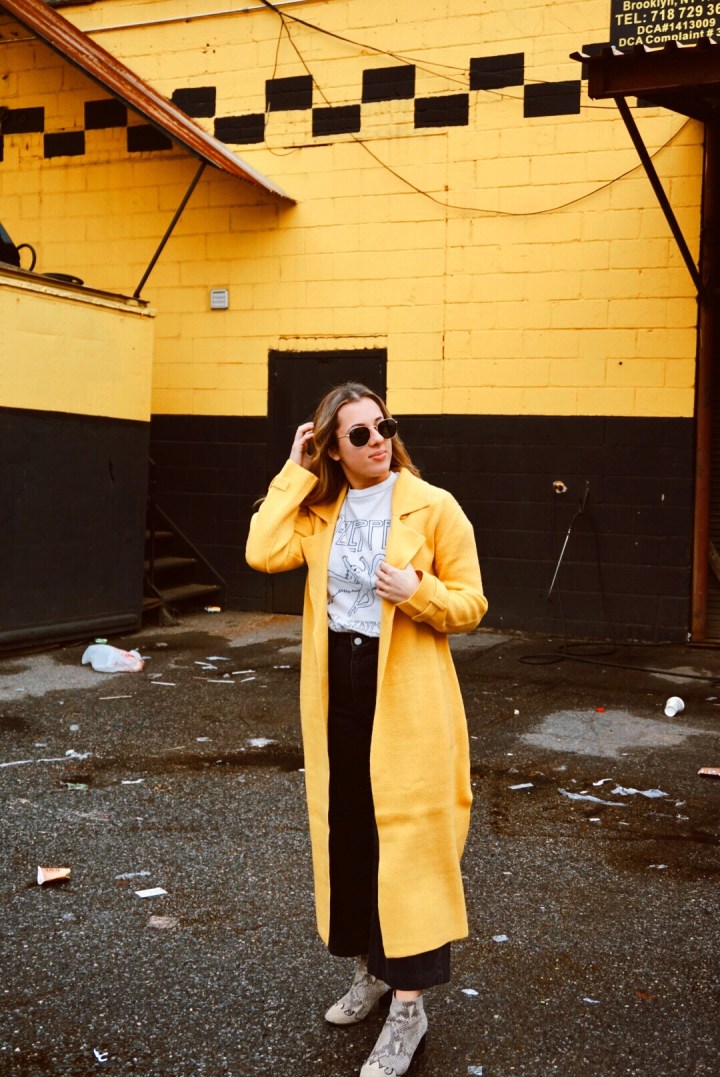
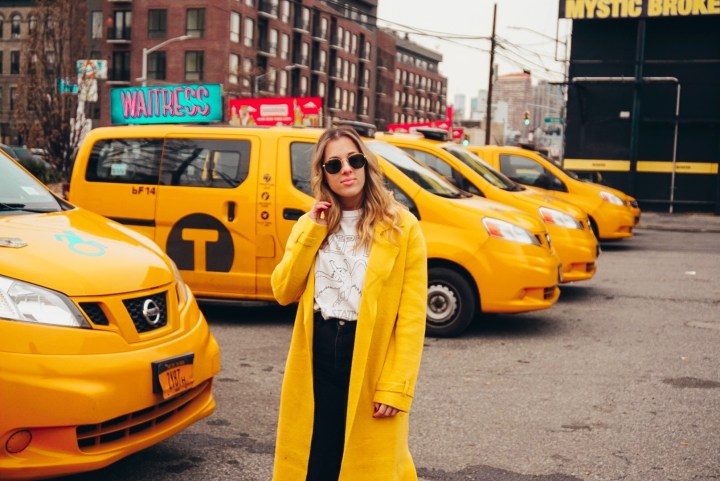
Mustard cardigan // French Connection, Black Wide Leg Jeans // French Connection, Band Tee // Urban Outfitters, Snake Booties // Free People


Although I like to think of myself as a social butterfly, there is really nothing I love more than being by myself in the comfort of my little space. Anyone else?
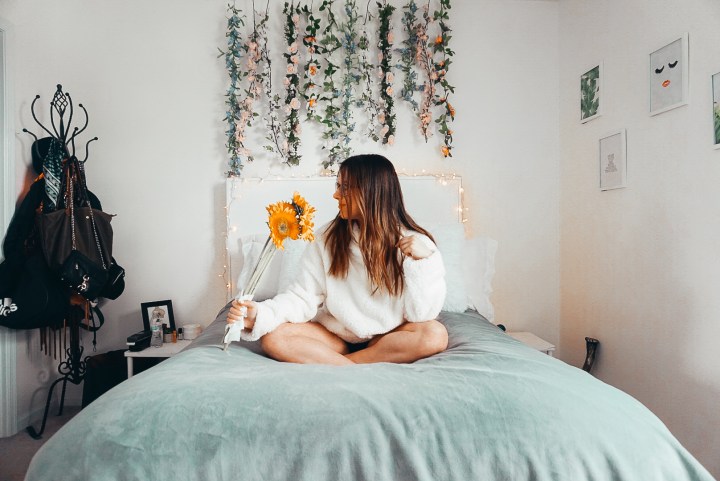
Ever since I was little, I would change and transform my room whenever boredom would strike me. Whether that meant painting the walls, drawing on the walls, moving my bed around… anything!
After basically going through the entire spectrum of the rainbow on my walls, a few years ago I finally decided to go classic and get the walls painted a creamy white, along with some white carpets. Yes, white carpets is risky business… I don’t recommend. Since then, I have somewhat turned into a minimalist and love my clean and organized little space.
I have always been a creative gal and love starting little projects. Although, i’ll admit I don’t always finish them. I’m not sure if it was the random 70 degree day we had a few weeks ago or WHAT.. but I once more got the urge to give my room a bit of a transformation. This time, it was straight DIY (do it yourself) style!
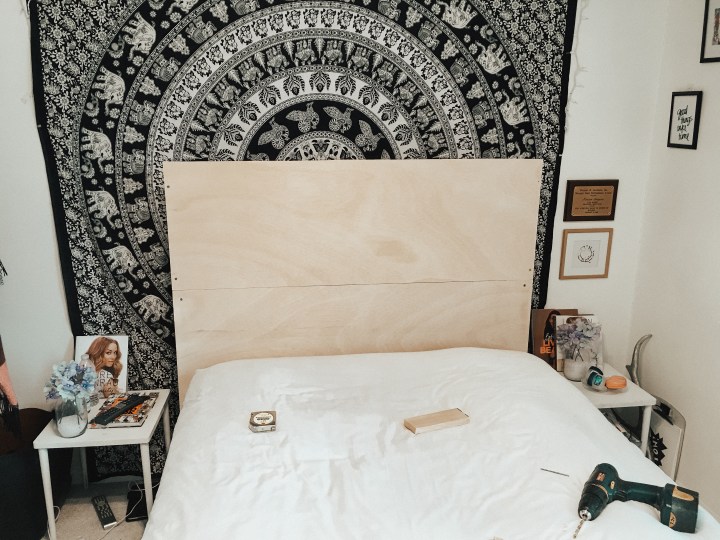
It all started when I decided that I wanted to get rid of the black and white tapestry taking up the main wall in my room. However, the tapestry was sort of masking the fact that my bed is without a headboard. So, that was the first order of business.
My first thought was to head to the thrift store, which was a fail. Although I did find some headboards, they were extremely dated and would require loads of work to get them from their old fashioned wood to a stark white! So, this is where I write a thank you letter to my dad, who is probably not reading this.
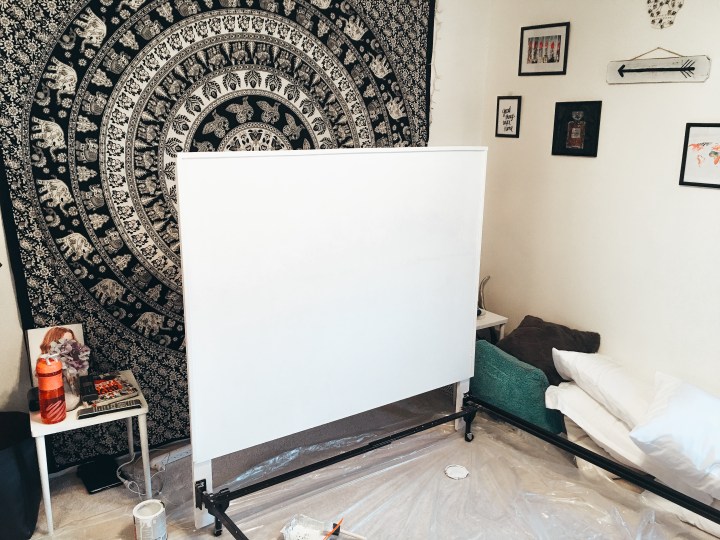
I have to give this one all up to my dad, because he took the time and effort to construct me my very own headboard! I LOVE IT. If I am being honest I have zero idea how this came to be, but I believe it involved two giant pieces of wood that got nailed together? No? I tried. It was then painted white and given a nice molding to finish it off.
After scrolling through Pinterest for days, I decided to make myself my own little terrarium (basically). I wanted my room to still have the clean and classic look, with a little something extra. I contemplated different ways to go about achieving this look, one involving finding a branch outside and hanging the flowers off of it, but that was a no go. So, I although this may look rather difficult, it wasn’t at all! You will probably need an extra helping hand however (thanks mamma).
I ran over to Michaels Craft Store, and wasn’t expecting to find the strands of flowers already made! I was fully expecting to buy individual flowers and have to mend them together myself, but I was happily mistaken.
I decided to stick with a somewhat neutral color scheme consisting of pink, lavender and white… but the options were endless! I went through and cut the strands to the appropriate length, and used both halves throughout the wall. I do recommend buying a few more than you may originally think because I had to run back to grab more.
Measure out where you want your flowers to go, screw in some s hooks, and hang your flowers! It’s as easy as that!

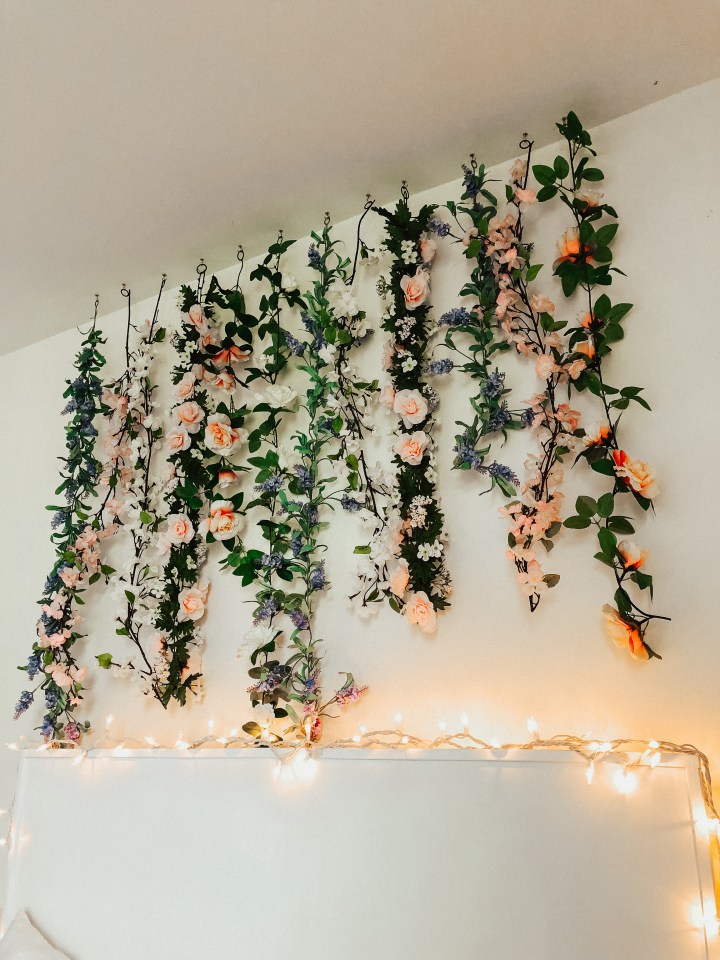

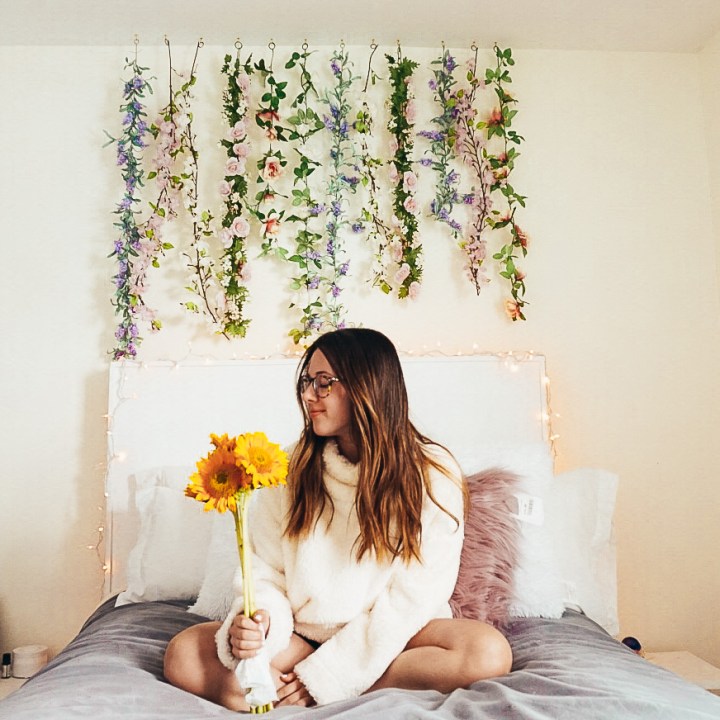
Can’t forget the twinkle lights around my headboard, simply the best part.
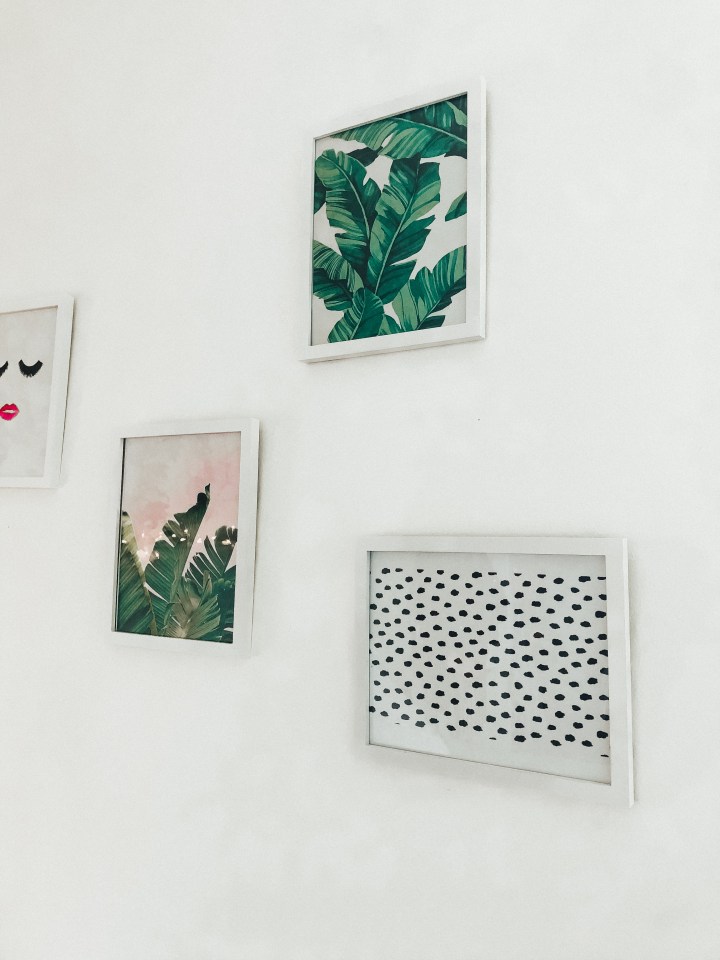
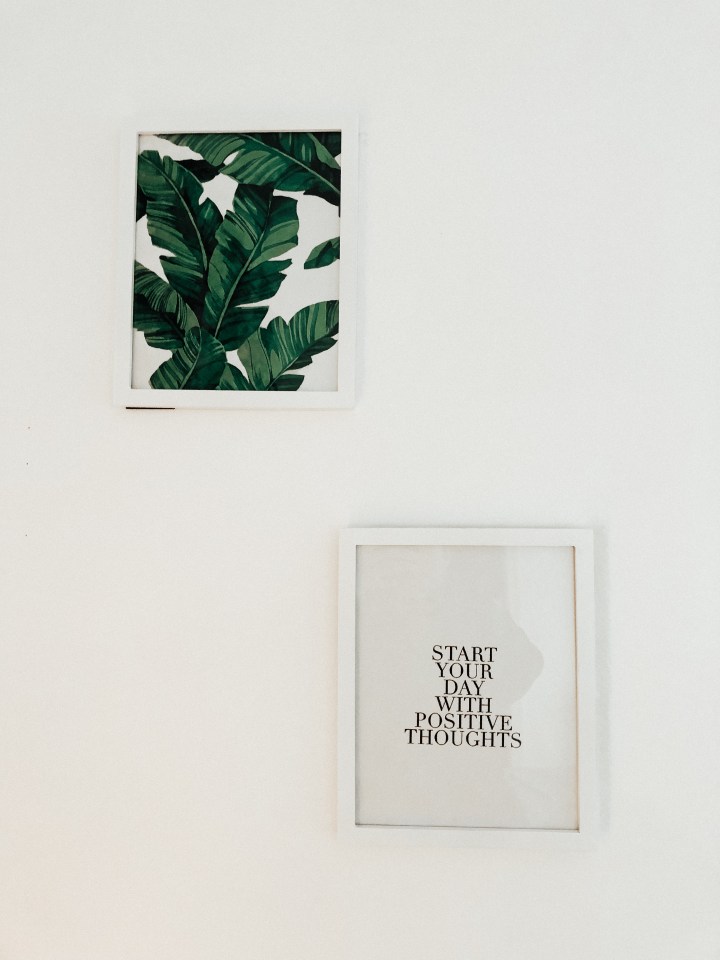
I love a nice photo gallery. I watched so many room tours on YouTube on the search for inspo, and kinda used a mixture of them all. I decided on these print outs below ↓
If you want to accomplish this transformation in an in expensive way like I did, then you can simply print these out yourself, rather than spending the money for hard print outs from Etsy (or anywhere else).
Believe it or not, I had some trouble finding white frames! I tried painting black ones, but they didn’t turn out as planned. Eventually however, my mom found these bad boys for me! Yay this is my gallery wall!

Now, i’m basically finished.. however spring cleaning is still on my list of things to do. Ugh, anyone else dreading it as much as I am!?

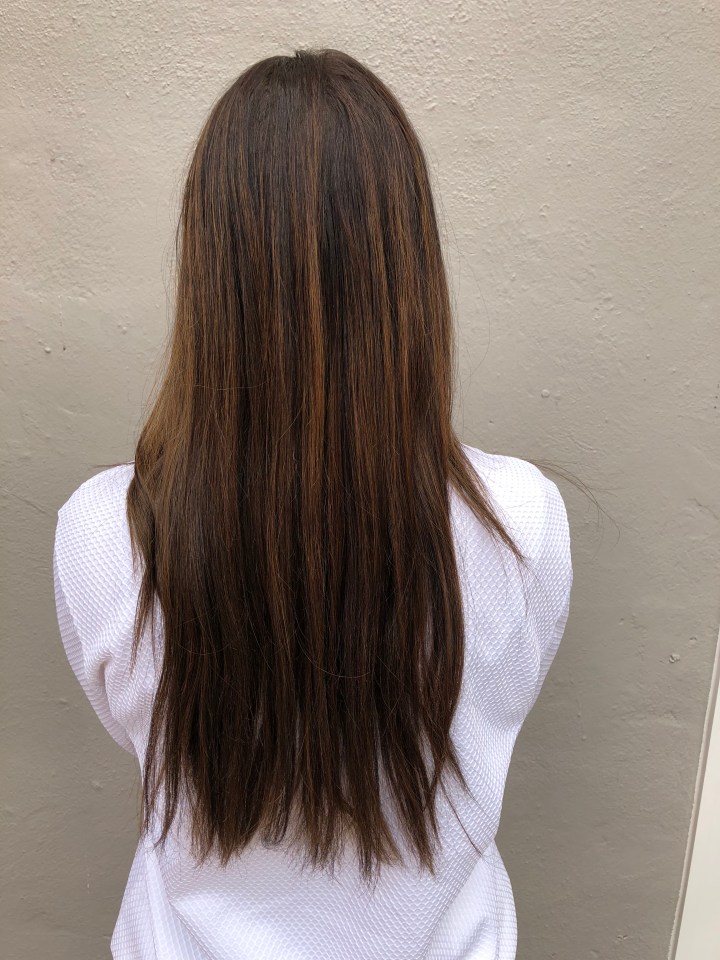
*Apologies for this post going up a day late, wanted to wait to get the photos from the salon for this post*
If you know me, you know that I have spent most of my younger years as a blondie.
My natural hair color is what most people would describe as “mousy”, so I have always found the lighter my hair, the more flattering it is on me! Before leaving to study abroad last January, I tried to do something different with my blonde locks. It didn’t exactly turn out as planned, so THE DAY BEFORE I left to go abroad I decided to dye my hair one color.. basically black. Talk about taking a major right turn. I went from blonde to black in the matter of a day! Instead of taking the time (which I didn’t have) to fix the blonde, I decided to take a somewhat easier way out, and go dark (which didn’t end up being so easy… sigh).
While the dark hair was convenient for the time I had it, I was still getting it done every few months to get rid of the lighter pieces coming through. Not to mention, it was simply too harsh for me and my skin tone.
Now, I am once more in the process of going light again, and I can’t wait! I had my second appointment with my amazing stylist yesterday, Amber, at Bobby Mack & Co and am en route to going back to blonde. If you’re anything like me, you like instant gratification. When I went to my first appointment I expected to go from black hair all the way back to blonde in a single appointment. Boy, was I wrong. Turns out, if you want to have any hair left on your head.. you have to make that transition the healthy way.
So, my first appointment was simply starting the process, and getting rid of some of the harshness of the black. I waited 6 weeks until my second appointment, and left with some amazing lightness in my hair! I couldn’t possibly trust Amber more, and I cannot wait to get to the final product. If you are at all interested in balayage and hair painting, Bobby Mack & Co will blow your socks off (take one look at their Instagram and you will understand why). ↓

Now time for a little before and after from yesterdays appointment!

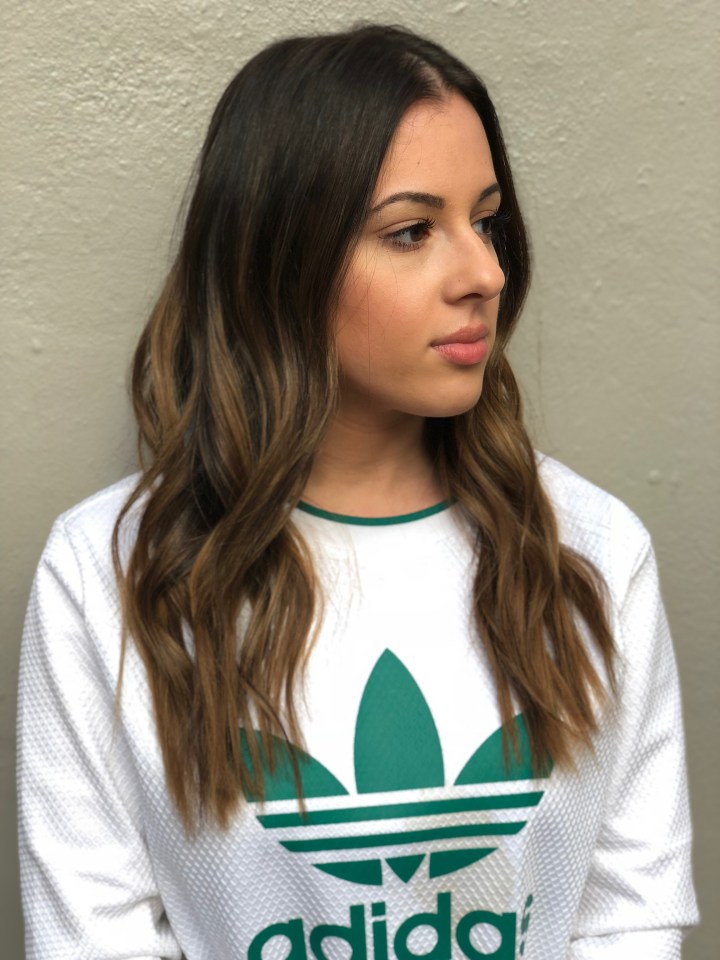
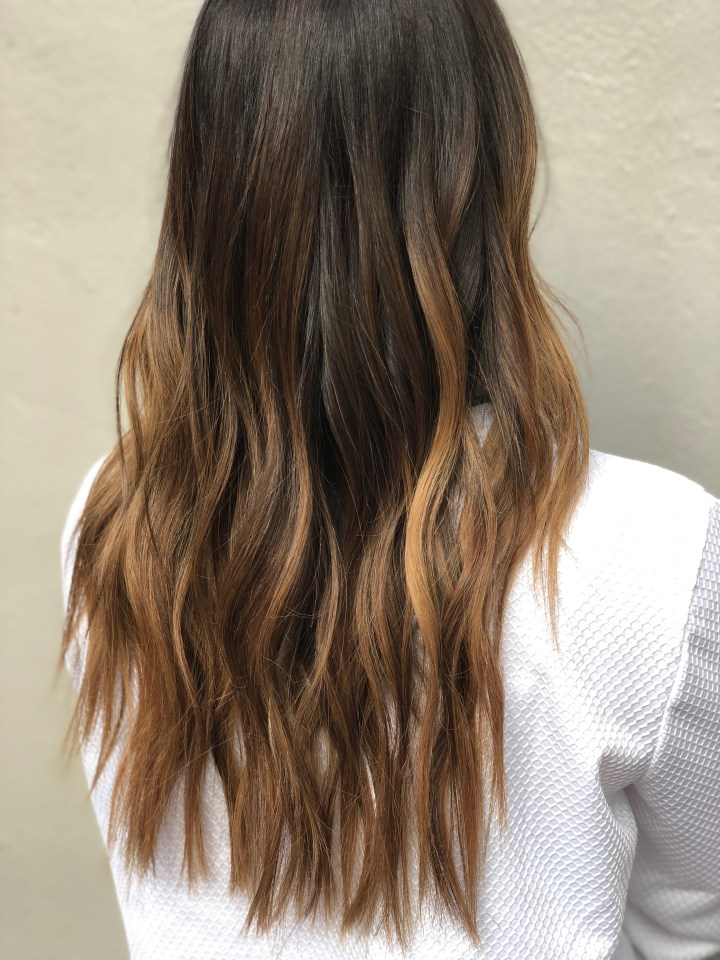
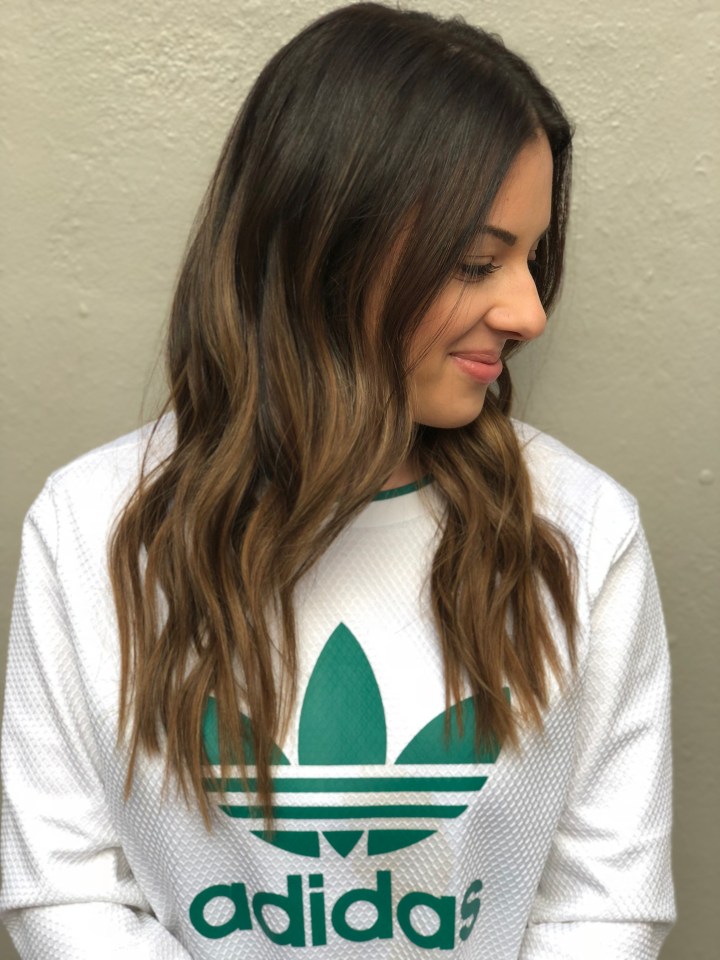
YES. PURE MAGIC. I KNOW.
I also got a cute little trim with some angles which I desperately needed in my life. Can’t wait until my next appointment right before GRADUATION.
Thanks for reading friends, HAPPY SNOW DAY EAST COASTERS.

PSA: If you didn’t understand the reference in the title… i’m disappointed in you.
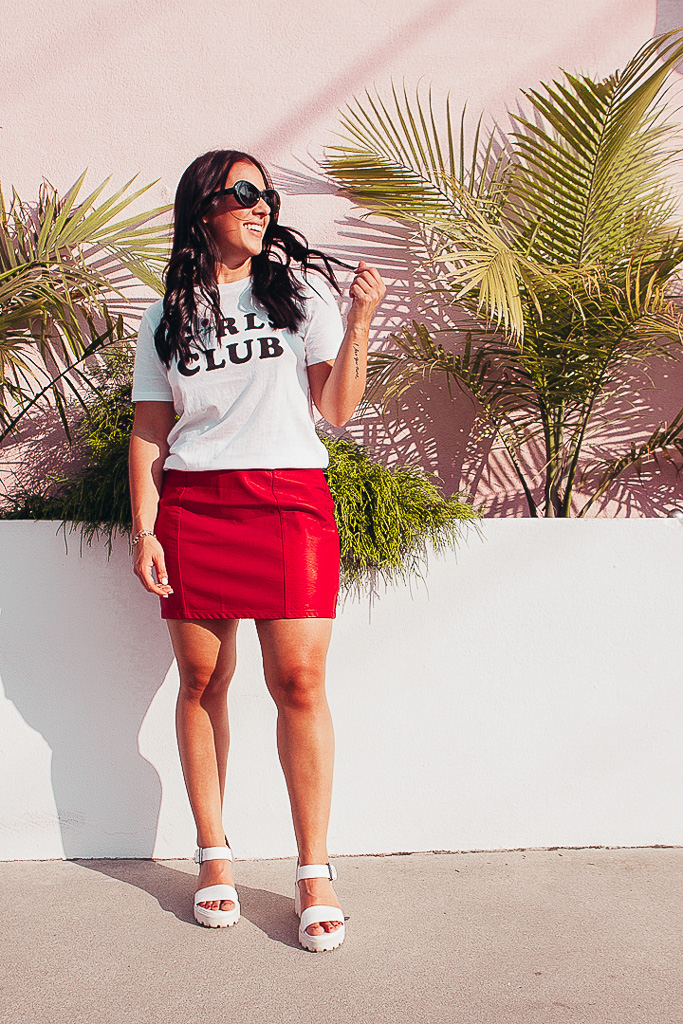
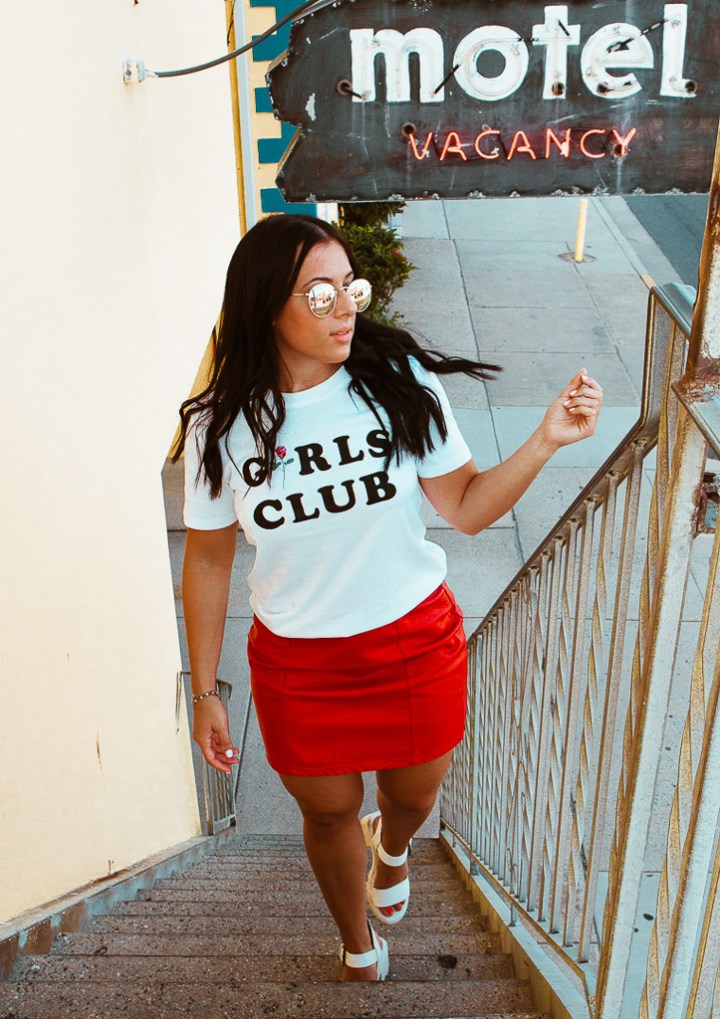
Oh hey there! Happy Tuesday peeps! Coming at ya live, with a new fashion post featuring only affordable clothing! Side note- I have found that most of the time, the exact pieces I am wearing are no longer available.. so in that case I do some research to find similar styles! Not to mention, most of the time they are on sale for KILLER deals, which pains me considering I most likely paid full price.
Anywayyyyy….
Before I move on I want to quickly make an announcement about my new blogging schedule. In the past, I would only post when I had time, which lead to inconsistency and lack of posts. NO MORE OF THAT NONSENSE AM I RIGHT. So, as of now every Tuesday I will have a new blog post out! The topics will vary from fashion, beauty, health, fitness, you name it. I am really looking forward to all of these fun posts to come, and I hope you are too! Also, suggestions would be more than appreciated!
On to the post!
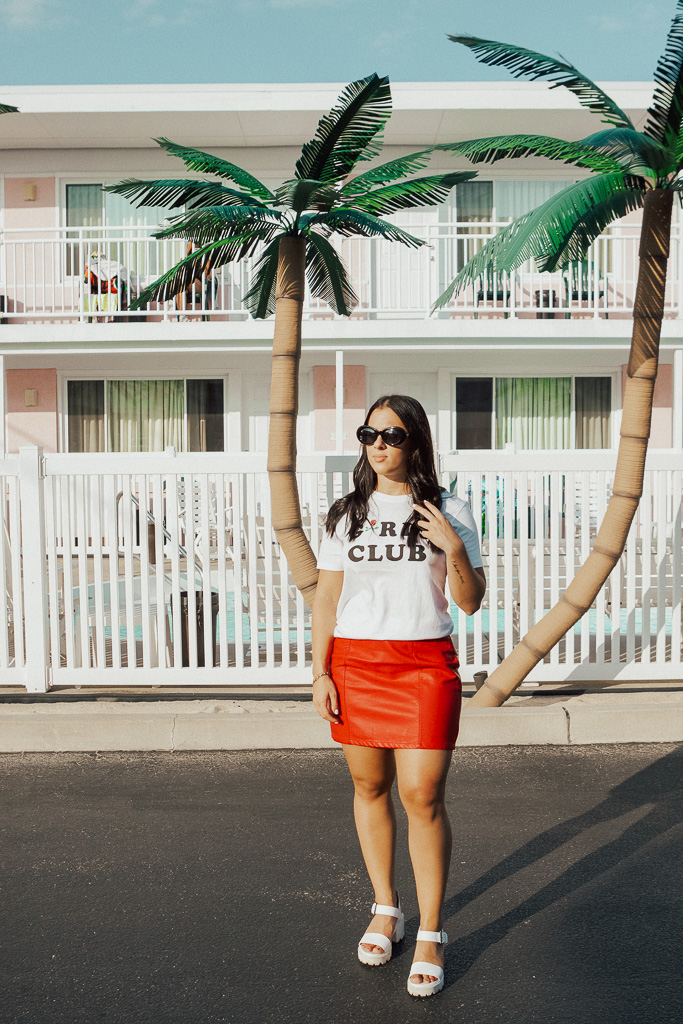
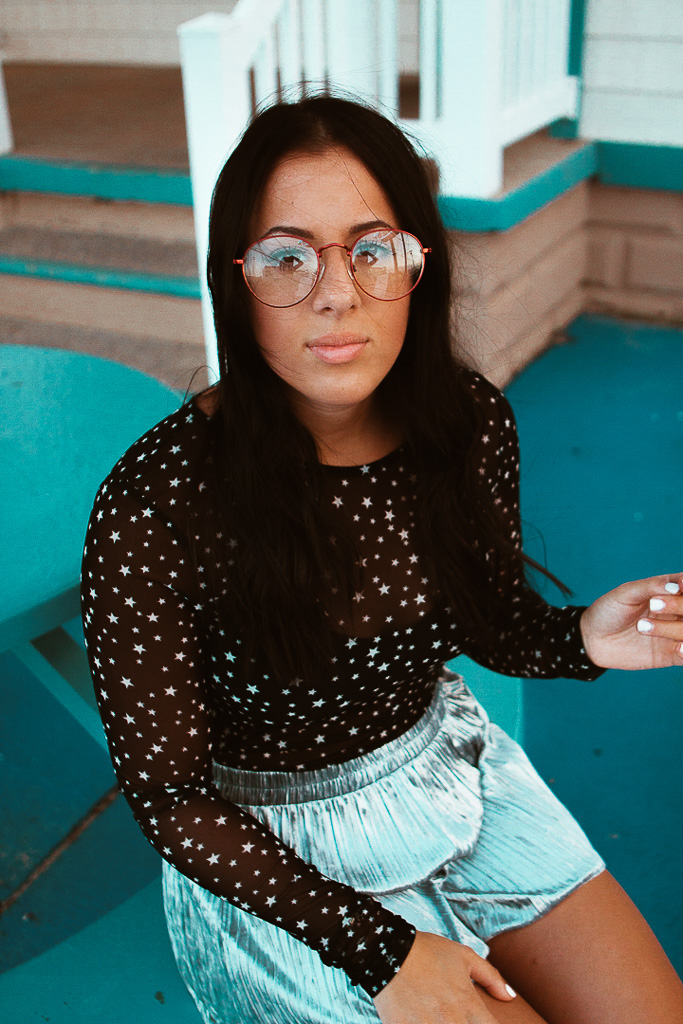
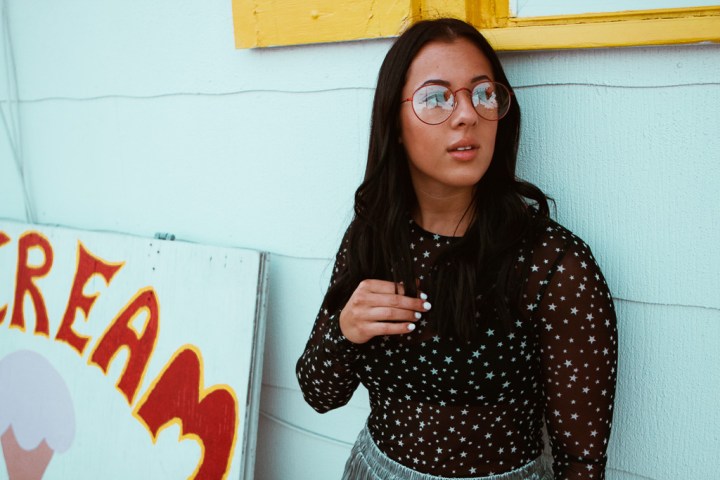
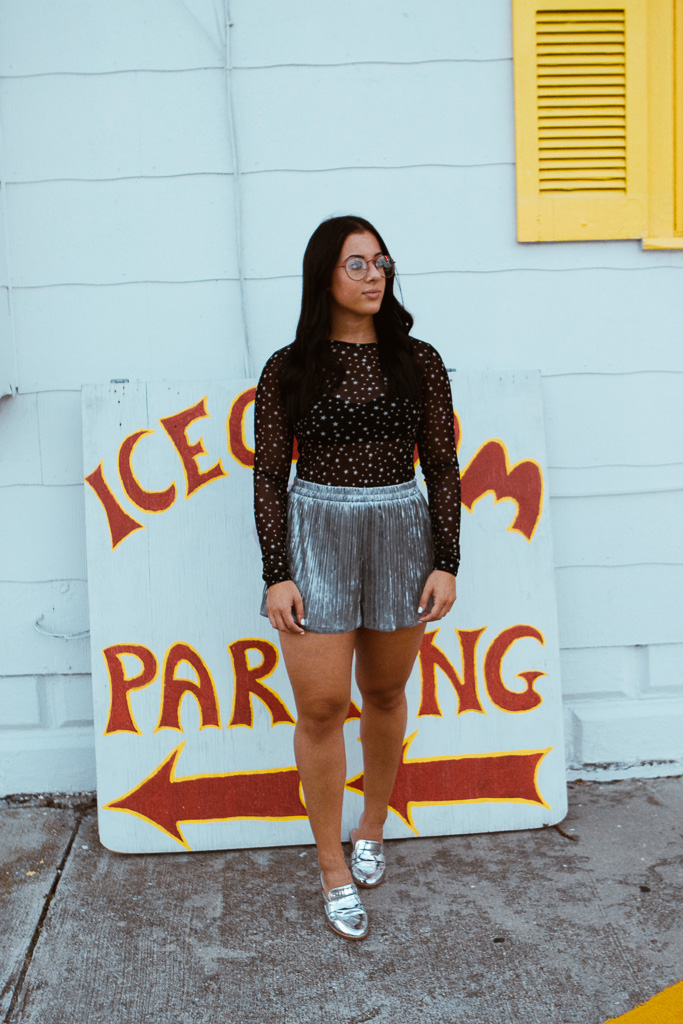
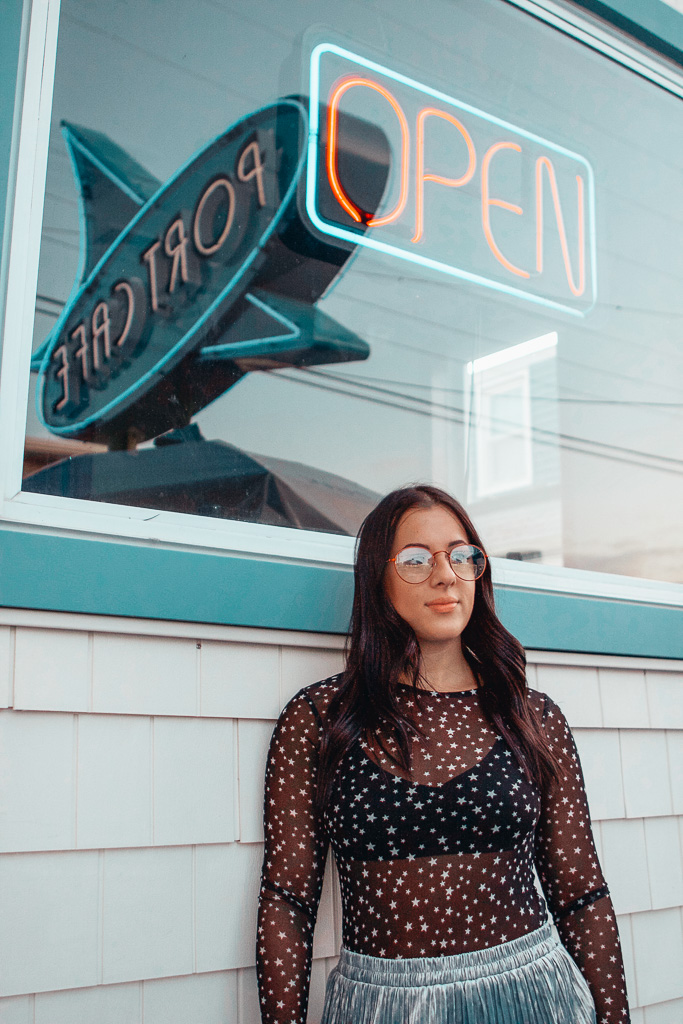
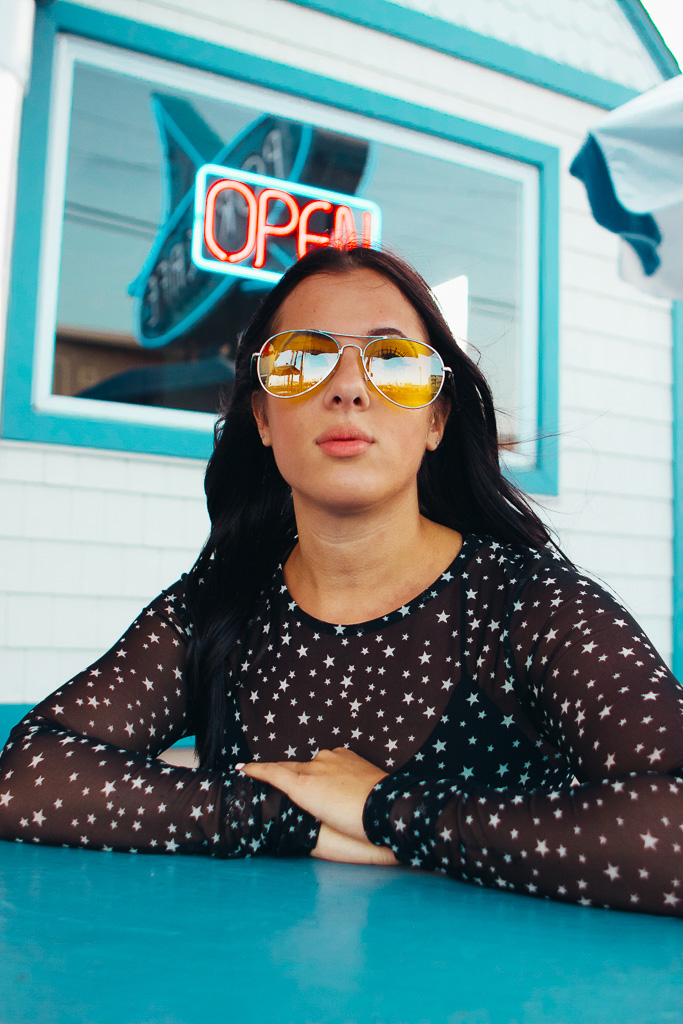
When planning this shoot, my friend Nicole and I wanted vibrant and fun scenery. We wanted neon signs, fun backdrops, the whole nine, and we got just that! All of these photos were taken in Wildwood New Jersey, which if you have ever been there, i’m sure this will make a lot of sense.
I remember running to the mall the day before this shoot thinking, I want something trendy yet affordable to make for some really cool photos. More times than not, you really do not have to break the bank at Urban to get the trendy look you’re going for. I’m living proof!


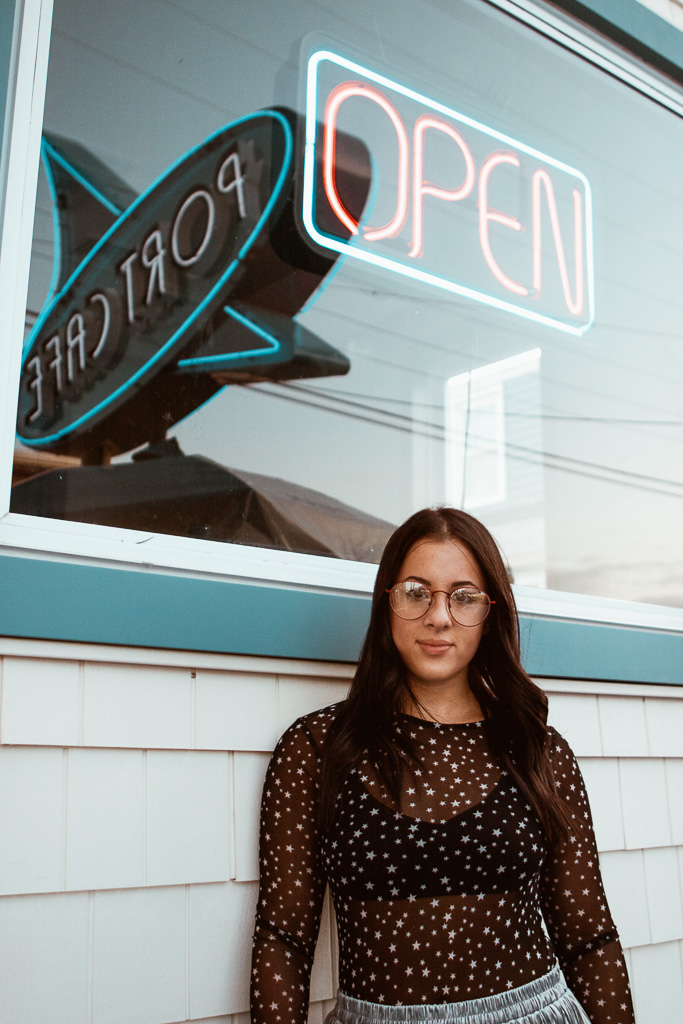
Correct me if I am wrong, but stars made a major comeback, right? *see last post for documented proof*
I found this star mesh top at Zara, and planned a whole shoot around it- and was so excited about how the photos came out.


Months ago while scrolling aimlessly through Instagram, I saw a blogger wearing a large puffy star jacket, just like this one. From that moment on.. I WAS A GIRL ON A MISSION.
I did some research and continued to find diddly squat. Bummer right? Wrong.
I will never forget the moment I spotted this beautiful lady hanging ever so perfectly on a rack in the middle of Bloomingdales. My vision had come to life, and I was ELATED.
With a jacket like this one, you can really do anything. I know, that sounds crazy… I mean, look at it. However, a statement piece is a girls best friend because it completes the look for you, requiring minimum effort. How nice is that!?


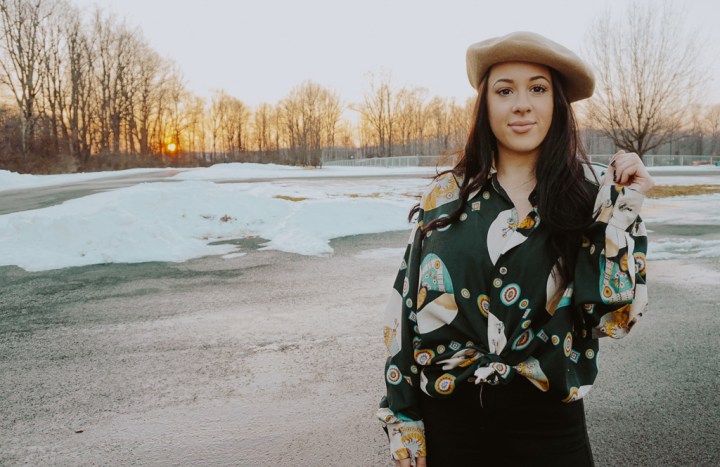
Do you ever come across a piece of clothing that you know is SO questionable, but you also kinda need it? That was this shirt. A while back I stumbled upon this Sacajawea inspired silk top and grabbed it for about 8 dollars at a thrift store on South Street here in Philadelphia. While it sat in my closet collecting dust for quite some time, I knew that one day I was going to wear it and love it. So- that is what I did!


Fun fact- If you look closely enough, you’ll see several tears streaming down my face considering it was about 20 degrees this day #neverforget.

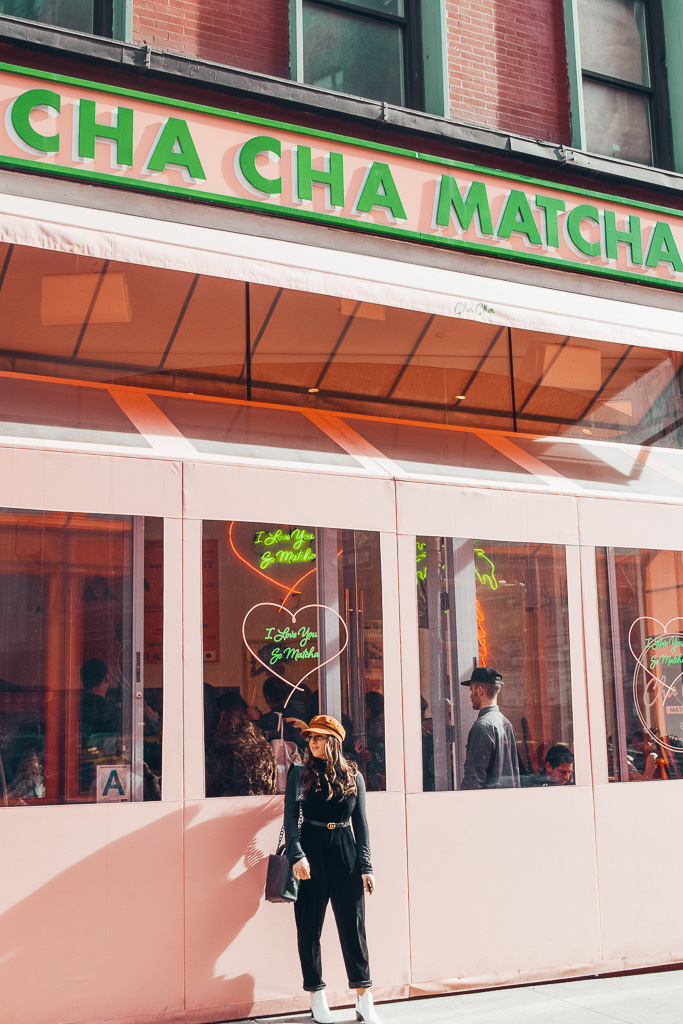
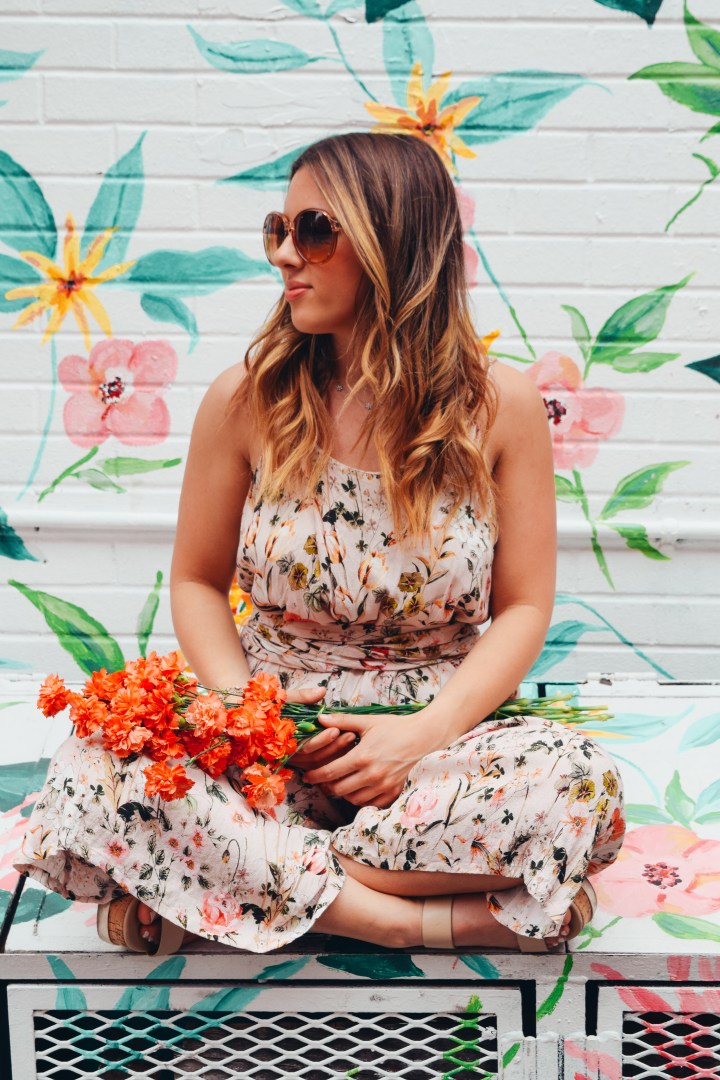
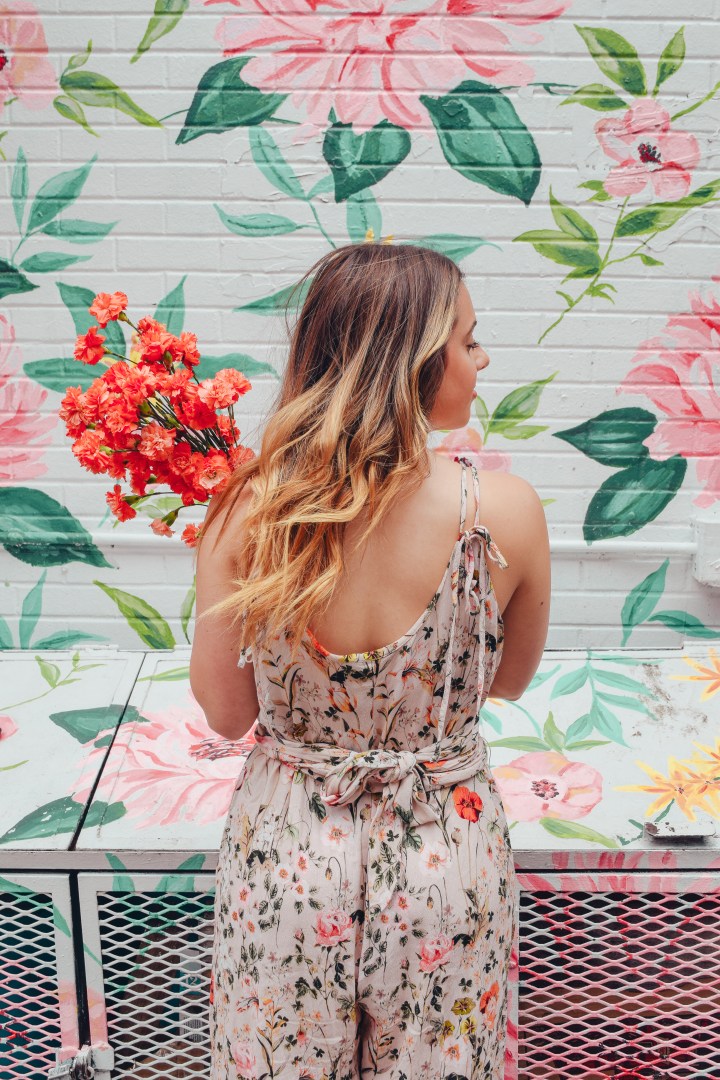
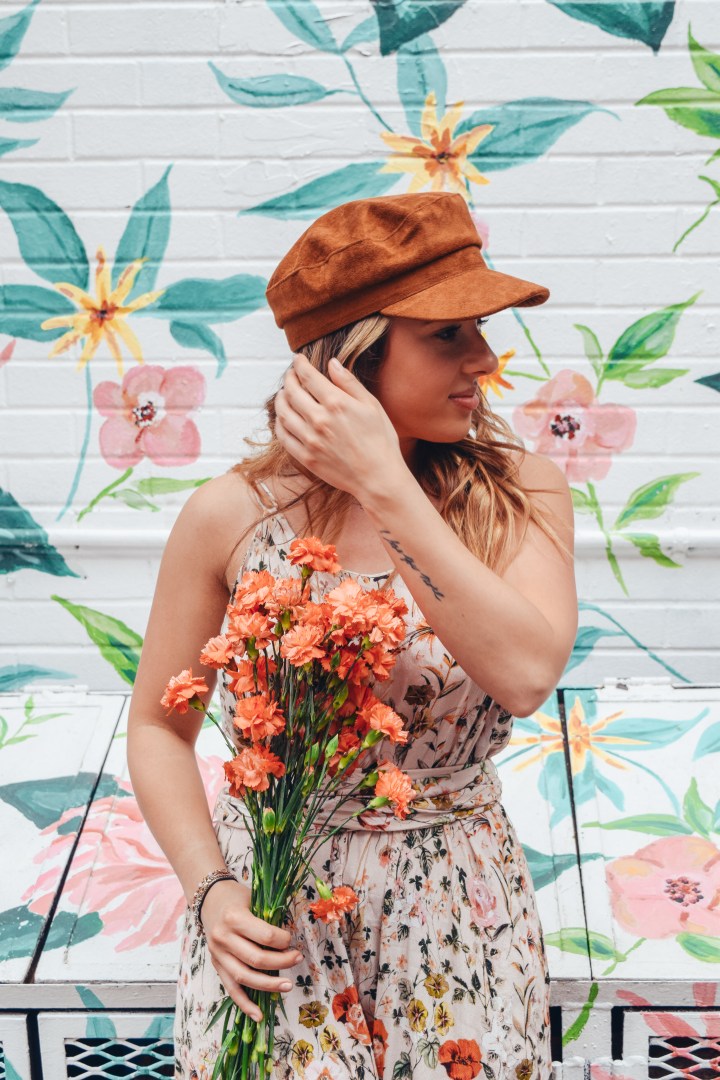
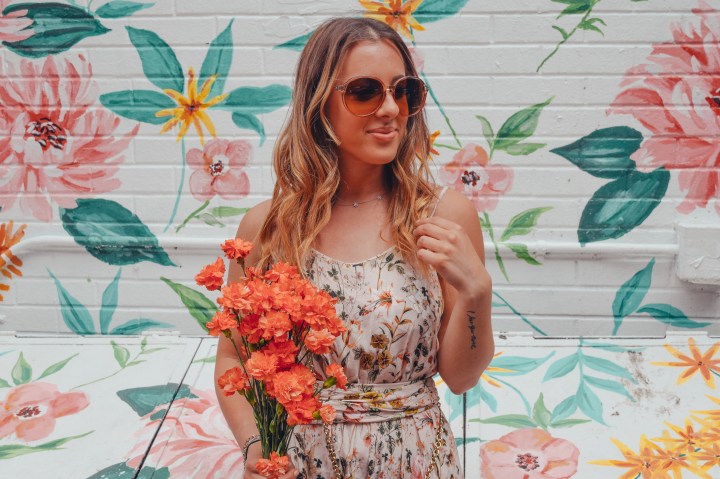
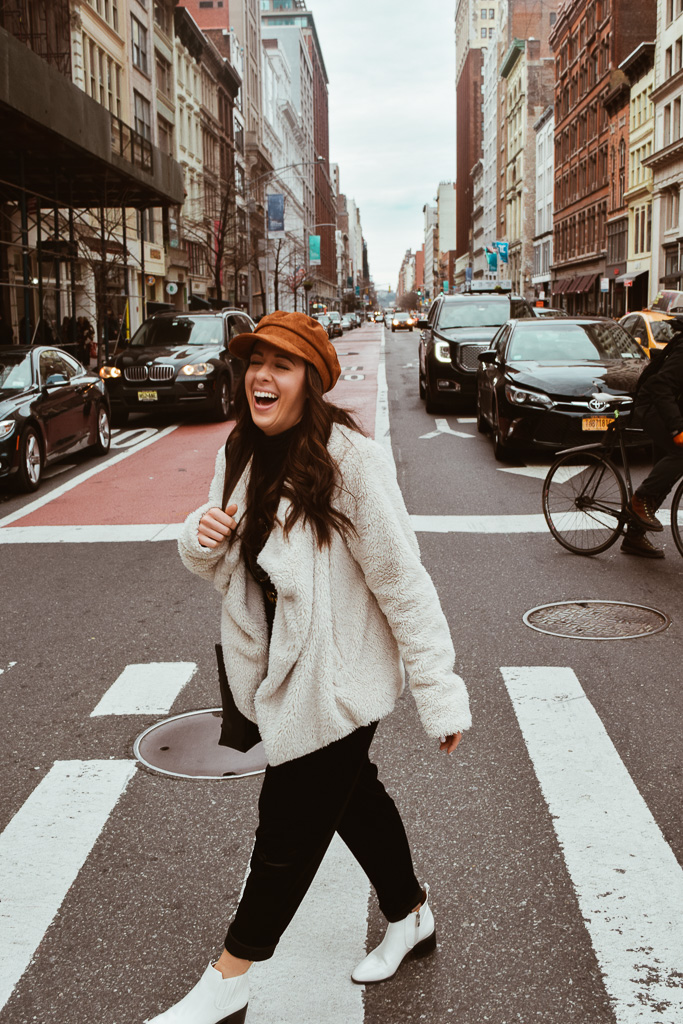
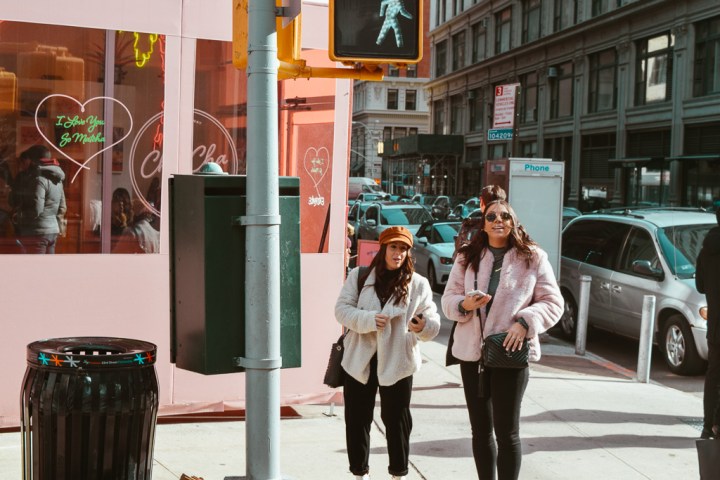
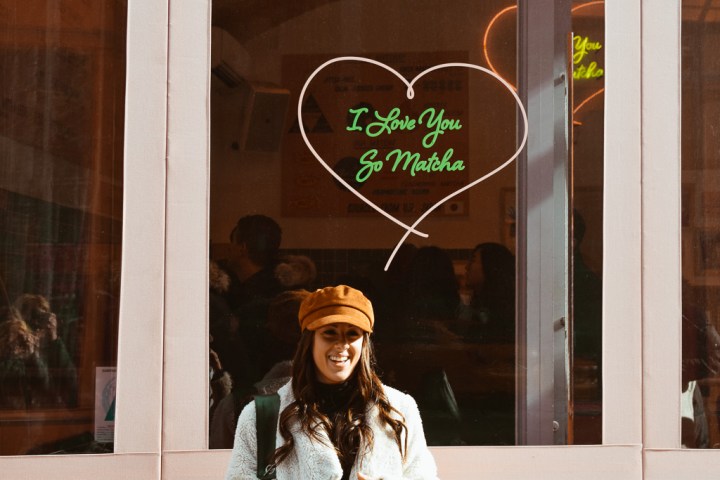
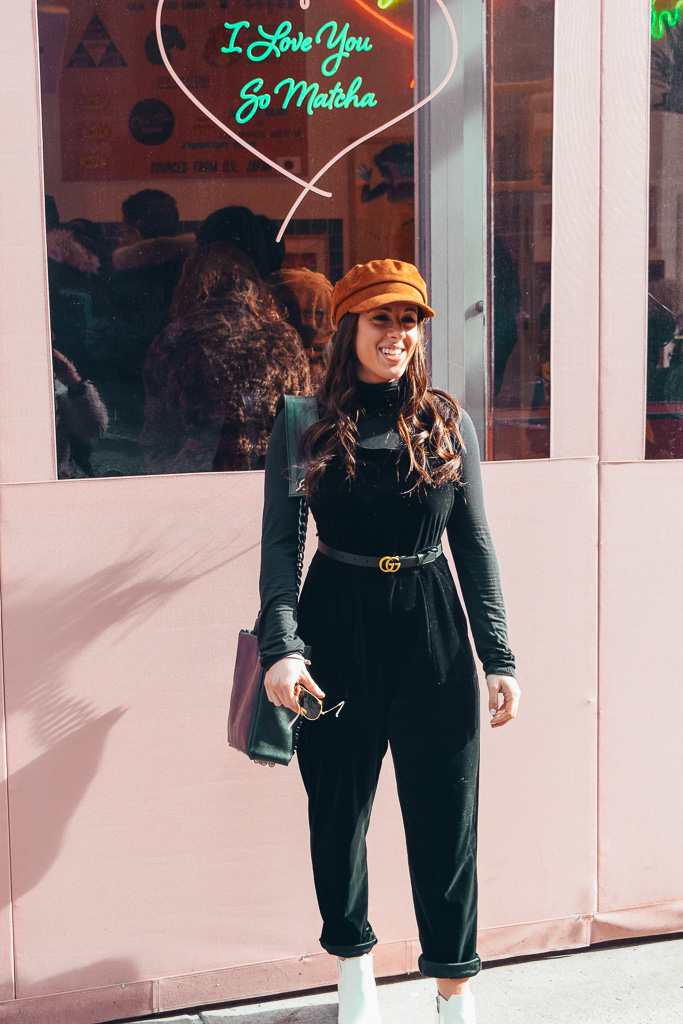
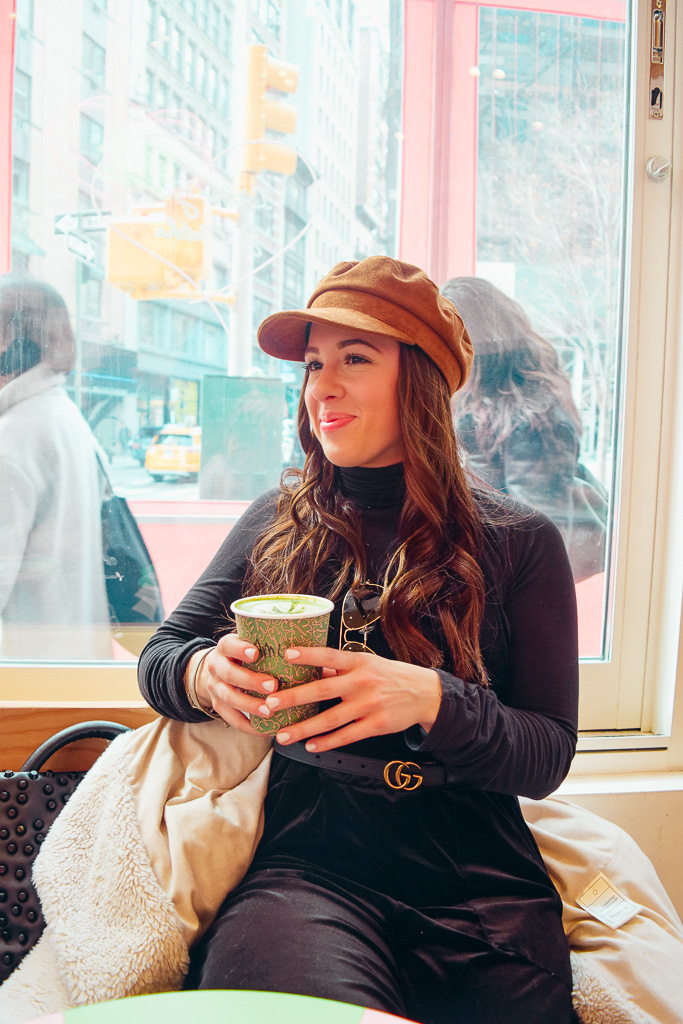
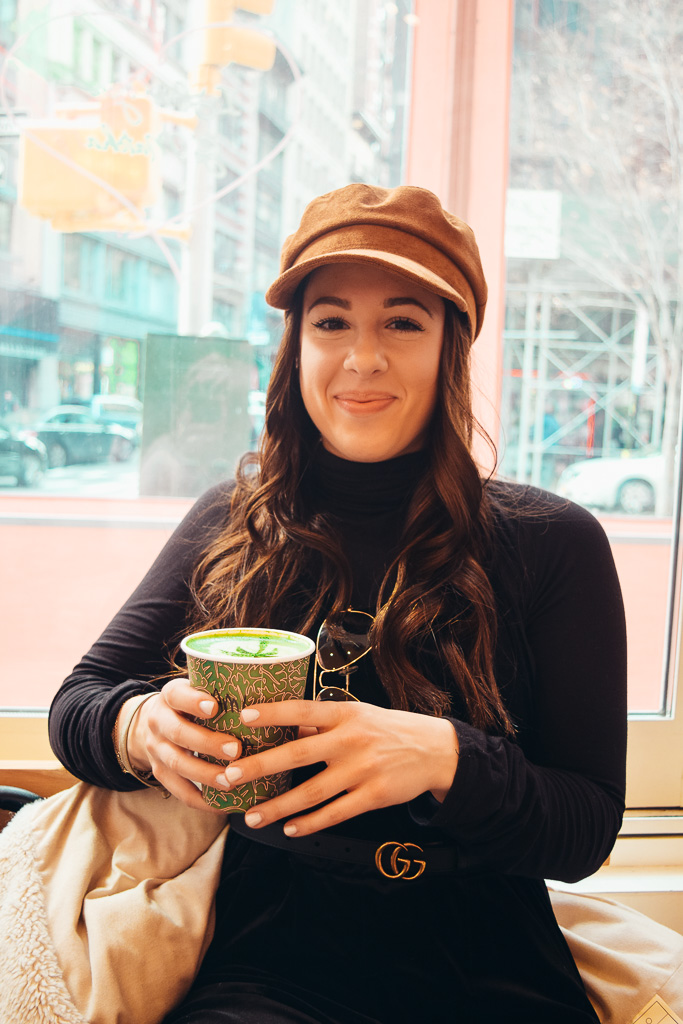
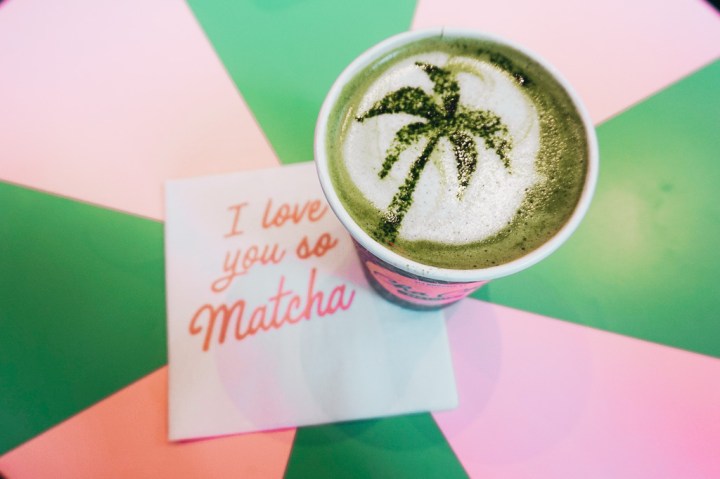
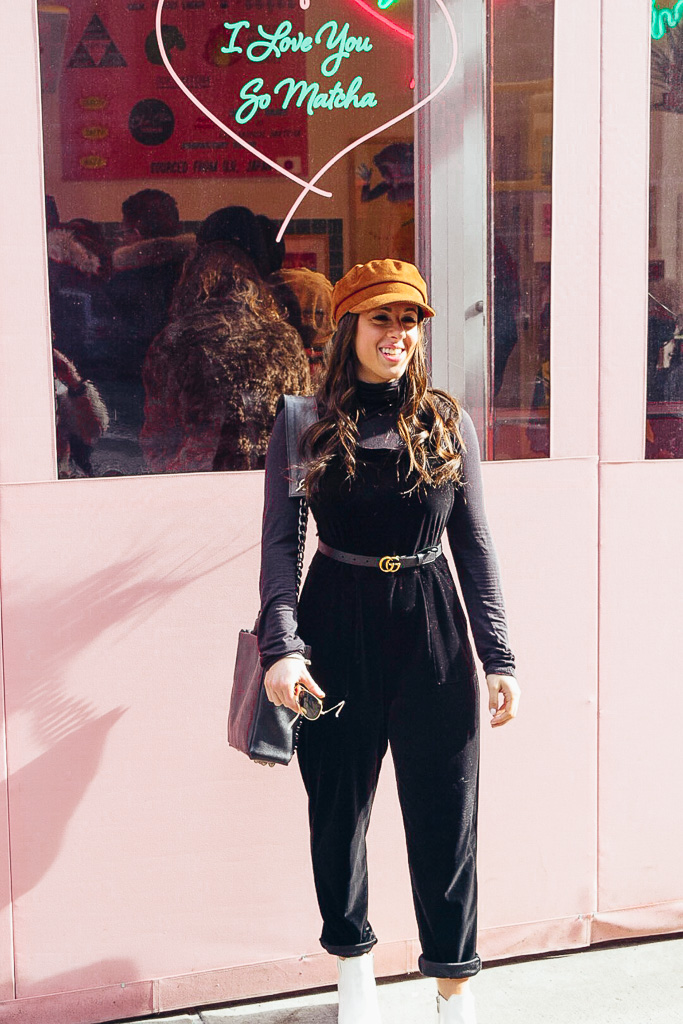
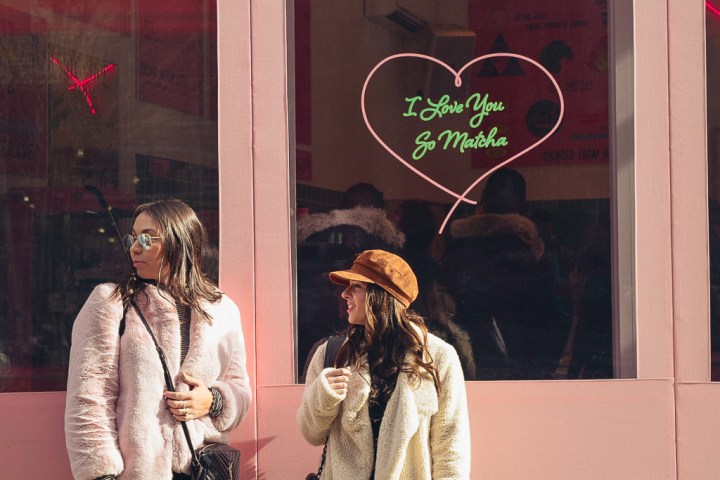
Ah, New York, New York. Although you leave me exhausted, helpless, and a little dirty, I can’t help but to love ya. Just a few weekends ago, I visited New York with a full agenda. This included a visit to by CHLOE, an Andy Cohen and Anderson Cooper live show (which was incredible), a visit to Cha Cha Matcha, and much more. Of course, I brought my camera along for the journey!
I have to admit, Cha Cha Matcha has been ALL over my Instagram feed and it was on the top of my priority list during this trip to New York. Funny enough- I hate green tea. Moment of silence for the money I willingly wasted at this establishment simply because it looked beautiful. If you say you have never purchased something simply for the Instagram, YOU. ARE. LYING. TO. YOURSELF.


Now that the weather is breaking a bit, I need to get my butt back to New York. What should I put on my to do list?
That’s all I got for today! I really cannot express how excited I am to get back to blogging. Unfortunately, the last couple months of school have completely drained every ounce of inspiration I had in me, BUT.. its a new semester and there are only good things ahead.
So many posts to come, I can hardly wait 🙂 Have an amazing day!
